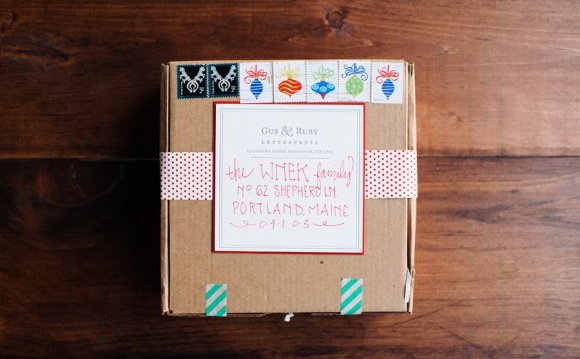
![]() About a year ago, we started printing our logo and Etsy shop name directly on our shipping labels. It was a small effort that we feel resulted in huge strides for the professional image and branding of our business.
About a year ago, we started printing our logo and Etsy shop name directly on our shipping labels. It was a small effort that we feel resulted in huge strides for the professional image and branding of our business.
In this post, we’ve laid out the steps you can follow to personalize your own shipping labels using Endicia. If you’re not an Endicia user, you should give them a try. Endicia is a long-term sponsor of EverythingEtsy.com and has continually offered our readers — YOU — a great special trial offer of 90 days free and a free digital scale with no commitment. Hard to beat the offer and, as you can see below, just this one little feature can make a positive impact on your business.
We use Endicia Professional which comes with a powerful software called DAZzle which has the ability to customize labels with graphics, “rubber stamps” for common postal messages such as Air Mail, and textboxes for your own text.
Use a Black and White Logo
We first started doing this with our logo in color and the packages were all delivered fine. But one day I decided to ask the post office staff to look at our custom label and give me any feedback they might have. The two bits of advice were to make the logo black and white to make it more compatible with automated machinery and to make it a little smaller than I had it at the time.
So the first step is to make your existing logo Black and White.
You can use most image editors to do this. Or if you’re familiar with Photoshop, it’s just a few easy clicks.
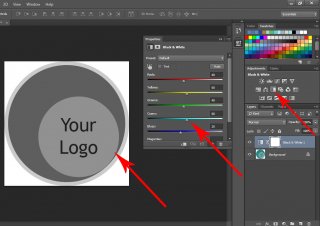 Open your logo file in Photoshop.
From the Panel Menu on the right, you can usually find the Adjustment panel. Or if it’s not docked there you can always go to Window > Adjustments to make it active. Find Black & White adjustment in the panel and click it. Your logo is now black and white. In the properties window that pops out, you can adjust the level of how black and white your logo is by adjusting the colors that are present in your logo before it turns black and white. From the image above, adjusting Cyans will make different levels of black and white on your logo.
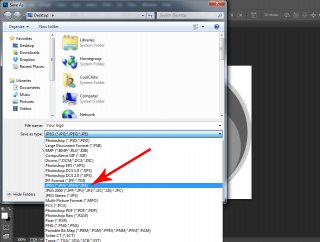
When you’re done making your logo into black and white, save it to any file type compatible with DAZzle. Here are the extensions allowed:
I usually choose jpg out of habit because it’s a smaller file for websites, but you can use whichever you prefer.
You now have the black and white version of your logo on the Desktop.
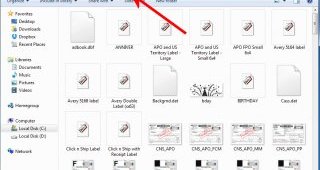
To make your image easy to find in the Endicia software you need put it inside DAZzle folder in your Documents. Copy the image, locate C:\Users\Public\Documents\Endicia\DAZzle (in Windows versions) and paste it inside the folder. You can simply copy and paste the address in your Windows Explorer address bar and you will be directed to the right folder. (usually)
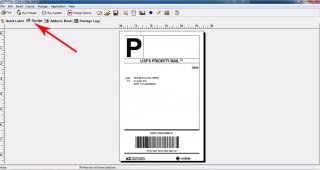
 It’s time to go make a new layout. Open DAZzle and from the tab just right above the ruler, select Design. By default, you probably have the “Click n Ship” Label layout open which is a half-sheet label size, perfect for printing on plain paper or full sheet labels. We found full-sheet labels to be a wonderful time saver until we started using a dedicated label printer, which is the fastest and easiest way to go by far.
If you have opened a different layout and you want to go back to the default layout, just go to File > Open Layout. Find Click n Ship Label and open it.
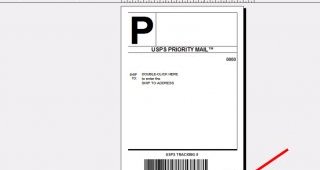
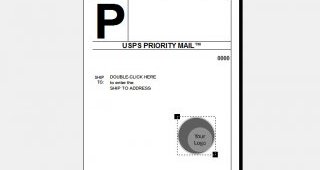
To add your logo, hit Insert from the main menu tab and select graphic. Choose your logo and open it. There will be a pop out window that tells you what type of image you are opening and the size of graphic option. Just paste it anywhere, resize and drag it to the bottom right of the address box, just above the solid black line that marks the top of the USPS tracking barcode area.
NOTE: Your label will also have a return address showing and the SHIP TO: address will be lower. It looks this way in the pictures because I used a non-registered installation of the program for the purposes of the tutorial only. Easier than trying to cover any personal information in the video and images.
It’s important to keep your logo well clear of any areas that have to be read by machines, which includes the addresses and the scan codes.
Next, to add the name of your shop, add a text box by going to Insert and select Text Box. In the window that pops out, type the URL of your website or name of your shop. Paste it at the very bottom of the label, below the USPS scan code area. You can move it by dragging or using your arrow keys.
You are now ready to save your custom layout. Go to File > Save Layout As, type in a name you’ll remember and click Save. If you use Save and not Save As, you’ll overwrite the default Click N Ship label and your new label will be the default.
Printing Your Custom Label
Once your Endicia account is all set-up and connected, and you’ve added some funds to cover postage, you can print your prepaid shipping labels easily using either a dedicated label printer or a standard plain paper printer.
RELATED VIDEO


Share this Post
latest posts
-
 Shipping containers House March 11, 2026
 -
 Home mold Removal Services February 19, 2026
 -
 Local Tree Removal Service January 30, 2026
 -
 Paintless Dent Removal Services January 10, 2026
 -
 Trailer Removal Service December 21, 2025
 -
 Shipping Container Cabin Floor Plans December 1, 2025
 -
 Conex shipping containers November 11, 2025
 -
 Shipping containers for sale in Florida October 22, 2025
 -
 Shipping Container Ideas September 23, 2025